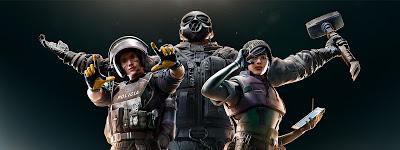
This is the second in a series of posts explaining some of the basics of Tom Clancy’s Rainbow Six Siege. This post will hopefully help to explain what each attacking operator can do.
Each operator will have their name written, next to which will be their armour and speed scores, for example, (1/3) for a 1 armor, 3 speed operator. Below this will be a short description of the operator's ability and a picture of their icon.
Ash (1/3)
She has a breaching round gadget which has 3 shots. Each shot can open any barricade including castle barricades and opens soft floor or walls. The breaching rounds have no projectile size and therefore can go through any sized hole.
Thermite (2/2)
He has 2 exothermic charges which open a walkable hole in a reinforced or unreinforced wall. They take 3 seconds to deploy and then roughly another 3 seconds to detonate. If an operator is within a few meters of the charge when it goes off then they will be killed or damaged.
Montagne (3/1)
Has an extendable shield which covers the whole front of his body, is bulletproof and protects from explosives. When his shield is fully extended, he is unable to use his gun, melee, run, vault, crouch, prone or interact with objects. Unlike normal shields, when fully extended, Montagne's shield will only shake slightly instead of being knocked aside.
Twitch (2/2)
She has 2 shock drones which can shoot a shock dart up to 7.5 meters. Each drone start with 3 charges and replenish over a period of 15 seconds. Shots can be used to destroy or disable all defender gadgets or do a single hitpoint of damage to an operator. Her drones cannot jump.
Blitz (2/2)
Has a shield which has the ability to flash someone up to 5 metres away (4 meters to achieve full blindness). Looking away will not prevent the blinding effect. The shield has 4 charges of the flash with a 7 second cooldown between each one.
IQ (1/3)
Her device can detect all defender electronic gadgets that are up to 20 meters away from her, including through walls and floors. She can see defenders on their phones, Pulse when he’s using his gadget, Vigil when his gadget is active, the bomb in bomb mode and the biohazard container in secure area.
Sledge (2/2)
Sledge can use his Breaching Hammer to create large holes in soft walls and destructible floors, as well as destroy hatches and barricades in one hit. The Hammer has 25 charges. Breaking a wall or killing an operator will use 2 charges, while all other uses will use one.
Thatcher (2/2)
Thatcher has 3 EMP grenades that disable all electronic defender gadgets in a 5.2 meter radius, which includes above and below it. The gadgets are disabled for 10 seconds. The EMP grenades will not affect attacker gadgets.
Thatcher’s EMP grenades will disable the following:
- Nitro Cells.
- Proximity Alarms.
- Smoke's Gas Grenades
- Mute's Signal Disruptors.
- Kapkan's Entry Denial Devices.
- Jäger's Active Defense Systems.
- Bandit's Shock Wire.
- Valkyrie's Black Eyes.
- Lesion's Gu mines.
- Ela's Grzmot mines.
- Kaid's Electroclaws.
- Mozzie's Pests.
- Pulse's Heartbeat Sensor. It freezes the screen; so it won’t pick up any more
- Echo's Yokai drone. It will make the drone fall to the ground if it was on the ceiling when it was hit by the EMP.
- Vigil's ERC-7.
- Maestro's Evil Eyes. The EMP causes the Evil Eye to be stuck halfway open meaning it can be destroyed by an attacker.
- Alibi's Prismas.
- Clash's CCE Shield's Taser.
- Attacker Drones hacked by Mozzie's Pests.
- Warden's Smart Glasses.
- Wamai's Mag-NETs.
- Surveillance Cameras.
- Melusi's Banshee.
Fuze (3/1)
Fuze has four cluster charges which take 1.5 seconds to be placed on all soft surfaces and when activated releases 5 cluster charges which launch in a line going from left to right before detonating in the same order. Each charge has an explosion radius of 4.2 meters. It deals lethal damage at up to 1.2 meters away from Medium and Heavy Armored operators and up to 2 meters for Light Armored Operators
Glaz (2/2)
The first sniper in the game, he has a thermal flip sight which shows enemy operators as bright yellow, even through smoke. This ability is deactivated if he moves for 2.5 seconds but will fully reactivate if Glaz stops moving for around 2.5 seconds.
Buck (2/2)
He has an under-barrel shotgun called the Skeleton Key which has 31 rounds. It has the most destructive power of any shotgun in the game with the ability to create large holes in soft surfaces.
Blackbeard (2/2)
He has 2 shields which he can attach to his gun to give some protection to his head. Each shield has 50 HP meaning they can take a few hits from bullets. When equipped they apply a movement penalty making him one of the slowest operators in the game, however the shield can be unequipped to remove this effect.
Capitão (1/3)
Capitão has a tactical crossbow. It comes with 2 fire bolts and 2 smoke bolts. The fire produced by the fire bolt has a maximum radius of roughly 6 meters which takes around 2 seconds to achieve. Like the fire from Goyo’s shields, it deals around 36 damage per second (DPS) and lasts around 10 seconds. The smoke bolt works similarly to a smoke grenade but has a diameter or 5 meters meaning it covers a wider area. Neither bolt has a projectile size so can pass through any opening, including bullet holes.
Hibana (1/3)
Hibana has 3 sets of 6 X-Kairos pellets which can be launched in clusters of 2, 4 or 6 and take five seconds to melt through the surface. They can be destroyed by gunfire, explosive or melee hits. Only 1 pellet is needed to destroy a Black Mirror, 2 for a castle barricade while 4 are required to destroy a hatch.
He can use his gadget to see enemy footprints which he can then scan (taking around three seconds) to learn the identity and location of the enemy operator. Upon the scan’s completion, a ping will be created at the location of the tracked enemy, this will update once every five seconds for a total of four pings over 20 seconds. It will not work on Caviera while her Silent Step ability is active. Footprints are only created when the defender crouches, moves or stands, not when they crawl. The footprints change colour depending on how long ago they were made, going from red at 0 seconds, to yellow at 20 seconds, light green at around 45 seconds, light blue at 65 seconds before disappearing at 90 seconds.
Ying (2/2)
Each of her 3 candelas contains 6 flashes that function similarly to Stun Grenades. They can be deployed either by throwing like a regular grenade, (which causes it to release the 6 flashes in a star- shaped pattern with 1 at each of the 5 corners and 1 in the centre) or it can be placed on a breakable surface (it will then fire 5 chargers from right to left and the 6th will drop in front of the Candela). The flashes are fired and detonated every fifth of a second. It is important to note that the Candela will not bounce, it will roll smoothly upon contact with the ground.
Zofia (2/2)
Zofia’s Lifeline has 2 Impact Grenades and 2 Concussion Grenades. These can be switched between using the fire mode key. The Impacts function much like impact grenades and the Concussion Grenades act like Ela’s Mines in that they cause visual and movement disruption, in addition they will detonate when close to an enemy, otherwise they detonate after a small delay. Like Capitão’s crossbow bolts, the grenades have no projectile size and can therefore pass through holes as small as a bullet hole.
Dokkaebi (2/2)
She has 2 Logic Bombs which cause all defender phones to start buzzing, unless they are by a mute jammer, this effect lasts for 12 seconds and in order to stop the buzzing before it ends naturally, the defenders have to perform a 3 second animation during which they cannot move or shoot. In addition, when the Logic Bomb is active, the defenders have no access to cameras. Killed defenders drop phones which she can use to hack defender cams giving access to all cams for the attackers
Lion (2/2)
Lion can use his drone 3 times in a match with a 15 second cooldown between activations. It will give a 1.5 second warning to all operators before the scan after which there will be a 2 second scan phase, during which if a defender moves, they will be detected and pinged repeatedly for the Attackers to see. Mute jammers and Vigil’s ability both prevent pinging.
Finka (2/2)
She can activate her Adrenal Surge three times a round. The Surge has a range of effects on attackers:
Positive Effects
- Gives a temporary boost of 20HP
- Reduces recoil while aiming down sights by 45%
- Reduces ADS time by 20%
- Reduces reload speed by around 15%
- Increases movement speed in Barbed Wire by roughly 40%
- Doubles recovery speed from stun or concussive gadgets
- Reduces concussion effects by 70%
- Removes tinnitus effect from explosions
- Revives downed players with 30HP + 20HP from the boost and takes 2.75 seconds vs the usual 4 seconds
Negative Effects
- Can be detected by Pulse’s Cardiac Sensor from 14 meters instead of 9 meters
- Increase damage from Smoke’s Gas Canisters by 50%
Maverick (1/3)
Has a Breaching Torch for burning holes in breachable surfaces. The breaching torch requires reloading when it has been fully used, it can also be reloaded prior to this however any spare fuel will be lost. Maverick begins the round with 5 canisters of fuel. The Breaching Torch can be used to very quietly create holes in any breachable surface. It can also be used to destroy barbed wire, deployable shields and other bulletproof gadgets. He can either create small holes to shoot through or larger holes which players can move through.
Nomad (2/2)
She has three Airjabs which push the defender back around 3 meters and knocks them down if they enter its radius and it has line of sight on the defender. It will affect all operators in the area of effect. Once deployed the Airjabs cannot be picked back up.
Gridlock (3/1)
When deployed, Gridlock’s 3 Trax Stingers act like barbed wire in that they slow down enemy operators and make noise, however they also damage opponents therefore working as flank protection and area denial. The maximum number of patches that can be deployed is 19, which takes 9 seconds and they deploy in a circular fashion, with the first patch deploying six around itself and those six each deploying a further two.
Nøkk (2/2)
When activated, Nøkk's gadget dampens her sound and erases her image from cameras. It lasts for a maximum of 12 seconds, before requiring a maximum of 6 seconds to recharge. It can be activated with a minimum of 25% charge. She will be completely invisible to cameras unless she sprints, fires her weapon, walks through Barbed Wire, takes damage, or does anything, such as pulling out a Gu Mine. If she does any of these then the peripherals of her screen will have a yellow interference to alert her. Nøkk does not trigger Alibi’s Prisma holograms.
Amaru (2/2)
Amaru has 4 uses of the Garra Hook which allow her to rapidly move through windows, unreinforced/open hatches and up to skylights and rappel-able ledges at the same level as her or higher. There is an 8 second cooldown between her uses of the Garra Hook.
Kali (2/2)
Kali has a sniper rifle with the highest possible zoom of any gun in the game. Kali’s gun can shoot through multiple breakable walls and open barricades and soft hatches with one shot. With a body shot we will kill a 1-armor operator, down a 2-armor and cause a large amount of damage to a 3-armor operator. In addition the rifle can fire Explosive Lances which are capable of burrowing into walls, including indestructible walls, and causing a small explosion on both sides of the wall. This explosion does not cause much damage to operators but destroys any gadgets nearby.
Iana (2/2)
She is able to create an exact replica hologram of herself, including her equipped uniform, headgear and weapon skin. The replica cannot rappel or climb down ladders, but also takes no fall damage. It has a time limit of around 15 seconds or can be exited at any time. It will always have a cooldown before it can be reactivated which is longer if it is destroyed.
Ace (2/2)
He comes with 3 SELMA Breaching Devices. They can be thrown at breachable surfaces and automatically detonate. It creates a wide opening and if there is room below it, it will lower and detonate once more, creating an opening through which operators can crouch or vault. Two SELMA Breaches are needed in order to open a reinforced hatch.
Zero (2/2)
Zero has four Argus cameras which he can launch into reinforced or unreinforced surfaces. They can then see either side of the surface. In addition each camera can fire a single laser to either destroy a defender gadget or deal 5 HP of damage to an operator.
Eloise Evans is an undergraduate student from the United Kingdom. Her love of games stems from the frustration she experienced playing various Red Alert games when she was young. Since then she has developed a particular love of the Elder Scrolls games and the Fallout series. At the moment she is playing a lot of Rainbow Six Siege and Sea of Thieves - arguably too much.
 .
.


